|
Samhain - Halloween Pumpkin Carving
The Jack O' Lantern is the festival light for Halloween,
and represented the souls of the dead.
The lit pumpkins or turnips were placed outside homes to ward off evil spirits
during the Feast of the Dead.
Make your own toothy or toothless pumpkin face for Halloween and shoo away
the ghoulies and ghosties.
How to carve your Halloween Pumpkin
Important - make sure that children are closely supervised
when cutting the pumpkin or do the carving yourself.
After you've carved it, to help keep your pumpkin
looking fresh, wipe out the inside and then put a small amount
of petroleum jelly on all the exposed, cut edges. This prevents
the moisture from getting out and should stop your pumpkin
from starting to wrinkle. Using a plant mister can help keep
your pumpkin moist.
If you see any signs of shrivelling soak your pumpkin in a bowl of
cold water for about half an hour. Adding a tiny amount of household
bleach to the water will help kill off any bacteria and slow down
any mould growth to help keep your pumpkin fresh. Also placing it
in a plastic bag in the fridge can help preserve a pumpkin for much
longer.
|
|

You'll need a pumpkin, a spoon, a pen,
a sharp knife, a tea candle, newspaper
Lay down plenty of newspaper or work on a
wipeable surface as it can get quite messy.
|

1. Draw a line around the pumpkin about two inches from the
top.Cut round to make a lid. Keep the knife angled in towards
the centre of the pumpkin to ensure your lid does not fall
through.
|

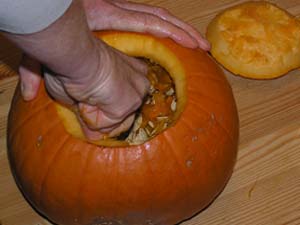
2. Carefully scoop the flesh out with a spoon, until hollowed
out and empty. The more you get out the easier it will be to
carve.
|

Don't be squeamish - get stuck in!
The wall for the front of the pumpkin should be no more than one inch
thick to make carving easier. Don't make it too thin, or the thin
areas will dry out and go wrinkly.
|

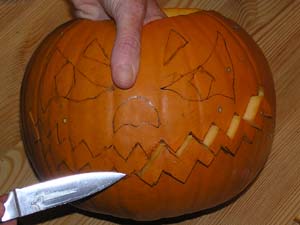
3. Draw your design on the outside, with a pen you can wipe
off later (not indelible). Choose a bold design for the mouth
especially, to make it more scary.
|

4. Cut into your design, carefully pulling
the cut sections out.
|

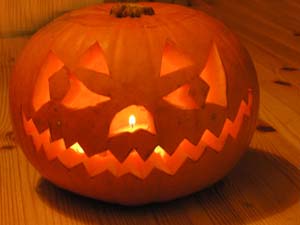
5. Place a lit tea-light in the pumpkin and replace the lid.
You may need two or three lights for larger pumpkins.
|

Happy Halloween!
|

Lights Out!
|
|

Halloween cat
|

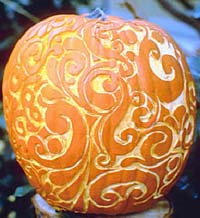
Carved pumpkin
|
 
|
Copyright Definitive Web 2005-2018. All
text and images are protected by copyright and may not be reproduced.
All trade marks or registered trade marks are acknowledged as property
of their respective owners.
We are not associated
with or endorsed by any of the companies or organisations featured. We endeavour to ensure all information is correct
and current but can not guarantee this and you agree that any use of
the site and information or links contained therein is at your own risk. Full
Terms and conditions of use. Site Map


